How to Lock Folder with Password in Windows 10 without Software

How to Lock Folder with Password in Windows 10 without Software

 How to Lock Folders with Password in Windows 10 without Software


In this article of "How to Lock Folder with Password in Windows 10 without Software", I will share simple and quick way of making your personal or private folder password protected.


For that you need to follow the below mention steps. They are...

> Step 1 : First you need to create a "New Text Document" & then "Paste" the Code.

> Code Link : Get Access To Code

> Step 2 : Type "Your Password" in the place of "YOUR PASSWORD".

> For demo I will type my password like "12345678" etc.

> After that "Save As" that text file with ".bat" extension. Like "FileNameETC.bat".

> Once the ".bat" file is created successfully, Double-click on it to create a "Private Folder".

> Step 3 : Now this "Private" folder work's as your Personal Folder with Password.

> Put any files, folders, images, videos and etc in that Private Folder.

> Once you done, Again double-click on that ".bat" file & then press "Y" key to lock
    that Private Folder with Password.

> As you see "Private" Folder disappear.

> Now if you want to "Un-Lock" the Private Folder then double-click on ".bat" file and this time it will ask for "Password".

> Now you will not access that folder without password.

> Type your "Password" and then press "Enter" key to open that Private Folder.

> Once you done with your change's in the Private Folder, Again double-click  on that ".bat" file & type "Y". This will again "Lock" the "Private Folder".

> That's it... Through this simple code you can easily lock your private folder with password in windows 10 for FREE and without using any software.

> Watch Video Tutorial : Click Here


How to Lock Folder with Password in Windows 10 without Software Code

How to Lock Folder with Password in Windows 10 without Software Code

How to Lock Folders with Password in Windows 10 without Software Code 

How to Lock Folder with Password in Windows 10 without Software Code


Copy below mention code :


@ECHO OFF
if EXIST "Control Panel.{21EC2020-3AEA-1069-A2DD-08002B30309D}" goto UNLOCK
if NOT EXIST Private goto MDPrivate
:CONFIRM
echo Are you sure to lock this folder? (Y/N)
set/p "cho=>"
if %cho%==Y goto LOCK
if %cho%==y goto LOCK
if %cho%==n goto END
if %cho%==N goto END
echo Invalid choice.
goto CONFIRM
:LOCK
ren Private "Control Panel.{21EC2020-3AEA-1069-A2DD-08002B30309D}"
attrib +h +s "Control Panel.{21EC2020-3AEA-1069-A2DD-08002B30309D}"
echo Folder locked
goto End
:UNLOCK
echo Enter password to Unlock Your Secure Folder
set/p "pass=>"
if NOT %pass%== YOUR PASSWORD goto FAIL
attrib -h -s "Control Panel.{21EC2020-3AEA-1069-A2DD-08002B30309D}"
ren "Control Panel.{21EC2020-3AEA-1069-A2DD-08002B30309D}" Private
echo Folder Unlocked successfully
goto End
:FAIL
echo Invalid password
goto end
:MDPrivate
md Private
echo Private created successfully
goto End
:End

> Watch Video Tutorial on "How to Lock Folder with Password": CLICK HERE

How to Fix This Site Can't be Reached in Google Chrome

How to Fix This Site Can't be Reached in Google Chrome

 How to Fix This Site Can't be Reached in Google Chrome

Method 1 : Command Prompt.

Step 1 : Open "Command Prompt" as Administrator.

Step 2 : Execute all below mention cmds one by one... (You will find these all cmds in the video description).


> Cmd 1 : ipconfig /release & then press "Enter Key"...

> Cmd 2 : ipconfig /all & then press "Enter Key"...

> Cmd 3 : ipconfig /flushdns & then press "Enter Key"...

> Cmd 4 : ipconfig /renew & then press "Enter Key"...

> Cmd 5 : netsh int ip set dns & then press "Enter Key"...

> Cmd 6 : netsh winsock reset & then press "Enter Key"...


That's it... Exit the command prompt


Method 2 : Set DNS Server Addresses.

> Preferred DNS Server : 8.8.8.8

> Alternate DNS Server : 8.8.4.4

> Tick the validate box & then click on "OK" button to save the changes...


> That's it... I hope one of the above method will works for you. Do mention that fix in the comment section...


> If my video helps you then Don't forget to Subscribe my Channel for more Videos... Take Care & Stay Blessed...

How to Fix Data Vocabulary Schema Deprecated Breadcrumbs Easily

How to Fix Data Vocabulary Schema Deprecated Breadcrumbs Easily

How to Fix Data-Vocabulary Schema Deprecated Breadcrumbs Easily


> Step 1 : Open "Google Search Console"...

> Step 2 : Select your blog on which you want to fix that breadcrumbs error...

> Step 3 : Click on "Breadcrumbs"...

> Step 4 : Click on "Valid with warning"...

> Step 5 : Scroll-down and then click on "Not started"...

> In this windows it will display all those pages which are affected by this error...

> Step 6 : Now how to fix it ? Sign-In into your blogger account...

> Step 7 : Select your blog and then click on "Theme"...

> Step 8 : Click on "Edit HTML"...

> Step 9 : Now press [ctrl+F] to open search bar & then search for : ".breadcrumbs a:hover"

> Step 10 : Copy the first 2 line code from the file & then paste them to under ".breadcrumbs a:hover"

Click Here for Code File


> Step 11 : After that again go to code file & then this time copy "id='backlinks'"...

> Step 12 : Again goto HTML, Press Ctrl+F & then search for "id='backlinks'"

> Step 13 : Select all the "<b:includable breadcrumbs" to "</b:includable>" code

> Step 14 : Go back to code file & then copy all "<b:includable breadcrumbs" to "</b:includable>" code...

> Step 15 : And then paste that code in-place of that code which you have selected...

> Step 16 : Once you done that just save theme now...

> Step 17 : Again open "Google Search Console"...

> Step 18 : Copy the URL which prompt that error message & then paste it on "Inspect any URL bar"...

> Step 19 : Click on "Test Live URL" button, This will start testing and fix this breadcrumbs error from blog...


> That's it...This will definitely fix this breadcrumbs error
message.
Data Vocabulary Schema Deprecated Breadcrumbs Warning Error Fix Code

Data Vocabulary Schema Deprecated Breadcrumbs Warning Error Fix Code

Data Vocabulary Schema Deprecated Breadcrumbs Warning Error Fix Code


.breadcrumbs a:hover


.breadcrumbs svg{width:16px;height:16px;vertical-align:-4px}

.breadcrumbs svg path{fill:#666}


id='backlinks'

<b:includable id='breadcrumb'

<b:includable id='breadcrumb' var='posts'> <b:if cond='data:blog.pageType == &quot;item&quot;'> <b:loop values='data:posts' var='post'> <b:if cond='data:post.labels'> <div class='breadcrumbs' itemscope='itemscope' itemtype='https://schema.org/BreadcrumbList'> <svg viewBox='0 0 24 24'><path d='M10,20V14H14V20H19V12H22L12,3L2,12H5V20H10Z' fill='#000000'/></svg> <span itemprop='itemListElement' itemscope='itemscope' itemtype='https://schema.org/ListItem'> <a expr:href='data:blog.homepageUrl' title='Home' itemprop='item'> <span itemprop='name'>Home</span></a> <meta content='1' itemprop='position'/> </span> <svg viewBox='0 0 24 24'><path d='M5.5,9A1.5,1.5 0 0,0 7,7.5A1.5,1.5 0 0,0 5.5,6A1.5,1.5 0 0,0 4,7.5A1.5,1.5 0 0,0 5.5,9M17.41,11.58C17.77,11.94 18,12.44 18,13C18,13.55 17.78,14.05 17.41,14.41L12.41,19.41C12.05,19.77 11.55,20 11,20C10.45,20 9.95,19.78 9.58,19.41L2.59,12.42C2.22,12.05 2,11.55 2,11V6C2,4.89 2.89,4 4,4H9C9.55,4 10.05,4.22 10.41,4.58L17.41,11.58M13.54,5.71L14.54,4.71L21.41,11.58C21.78,11.94 22,12.45 22,13C22,13.55 21.78,14.05 21.42,14.41L16.04,19.79L15.04,18.79L20.75,13L13.54,5.71Z' fill='#000000'/></svg> <b:loop index='num' values='data:post.labels' var='label'> <span itemprop='itemListElement' itemscope='itemscope' itemtype='https://schema.org/ListItem'> <a expr:href='data:label.url + &quot;?&amp;max-results=16&quot;' expr:title='data:label.name' itemprop='item'> <span itemprop='name'><data:label.name/></span> </a> <meta expr:content='data:num+2' itemprop='position'/> </span> <b:if cond='data:label.isLast != &quot;true&quot;'> <svg viewBox='0 0 24 24'><path d='M8.59,16.58L13.17,12L8.59,7.41L10,6L16,12L10,18L8.59,16.58Z' fill='#000000'/></svg> </b:if> </b:loop> <svg viewBox='0 0 24 24'><path d='M8.59,16.58L13.17,12L8.59,7.41L10,6L16,12L10,18L8.59,16.58Z' fill='#000000'/></svg> <span><data:post.title/></span> </div> </b:if> </b:loop> </b:if> </b:includable>
How to Fix Ethernet doesn't have a Valid IP Configuration in Windows PC/Laptop

How to Fix Ethernet doesn't have a Valid IP Configuration in Windows PC/Laptop

How to Fix Ethernet doesn't have a Valid IP Configuration in Windows PC/Laptop


> Fix 1 : Open "Command Prompt" as Administrator...
> Type cmd 1 : netsh winsock reset
    and then Press "Enter Key"...

> Type cmd 2 : netsh int ip reset
    and then Press "Enter Key"...

> Type cmd 3 : ipconfig /flushdns
    and then Press "Enter Key"...

> Restart your PC/Laptop... If this method does not work for you then move to 2nd fix...


> Fix 2 : Uninstall Network Adapters drivers...
> Once you done that restart your PC or  Laptop... It will automatically install it...


> Fix 3 : Open "Command Prompt" as Administrator...
> Type cmd 1 : ipconfig /release
    and then press "Enter"...
> Type cmd 2 : ipconfig /renew
    and then press "Enter"...
> Type cmd 3 : ipconfig /flushdns
    and then press "Enter"...

> Restart your PC/Laptop...


> Fix 4 : Goto "Registry Editor"...
> Right-click on 26 & then click on "Permissions"...
> Tick the "Full Control" box & then hit "Apply-Ok" button to save the changes...

> After that open "Command Prompt" as Administrator...
> Type cmd : netsh int ip reset C:\resetlog.txt
   and then press "Enter Key"...

> Restart your PC/Laptop...


> If you still facing the same problem then try to install latest network adapter drivers for your OS...

> That's it... I hope one of the above solutions will work for you...

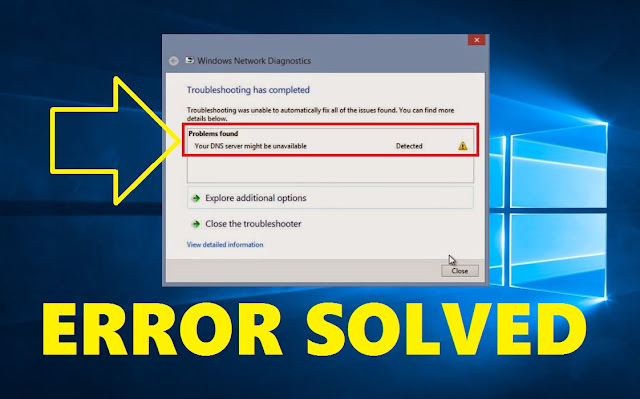
How to Fix Your DNS Server Might Be Unavailable Error in Windows 7/8/10

How to Fix Your DNS Server Might Be Unavailable Error in Windows 7/8/10

How to Fix Your DNS Server Might Be Unavailable Error in Windows 7/8/10

In this article of "How to Fix Your DNS Server Might Be Unavailable Error in Windows 7/8/10", I will share very simple way to solve this problem.


> Open Command Prompt as Administrator.

> Execute below mention commands one by one.

> Commands are following.


> command 1 : ipconfig /release
> After each command press "Enter Key" to execute the command...

> command 2 : ipconfig /all

> command 3 : ipconfig /flushdns

> command 4 : ipconfig /renew

> command 5 : netsh int ip set dns

> command 6 : netsh winsock reset

> Once you execute all the commands, Restart your PC or Laptop...

> That's it... Through this you can easily fix dns server might be unavailable error...
How to Protect your USB Drive with Password 2019 | Encrypted USB | Secure Flash Drive

How to Protect your USB Drive with Password 2019 | Encrypted USB | Secure Flash Drive

How to Protect your USB Drive with Password 2019 | Encrypted USB | Secure Flash Drive

With the help of this free software you can easily protect your USB or Pen Drive with Password, So that no one can access or see your Personal Data.


Click Here to Download

How To Delete All Liked Videos From YouTube At Once 2019

How To Delete All Liked Videos From YouTube At Once 2019

How To Delete All Liked Videos From YouTube At Once 2019

If you want to remove or clear all liked videos from your YouTube Account at once then read this article till end because in this article i will show you very simple and quick way to delete all liked videos from YouTube at once.

Steps to Delete All Liked Videos From YouTube At Once :

1st Step : Login into your YouTube Account.

2nd Step : Go to "Liked Videos"
Here it shows you all the videos which you like on YouTube.

3rd Step : Click on "Edit" button.

4th Step : Now right-click on any white-space area and then hit "Inspect".

5th Step : After that go to "Console" tab.

6th Step : In the console you need to paste the below mention code

Code Is :

var items = $('body').getElementsByClassName("pl-video-edit-remove-liked-video"); 
for(var i = 0; i < items.length; i++){
    items[i].click();
}


7th Step : Once you paste the code, Hit "Enter Key".

> If it doesn't work then again paste the Code, Hit "Enter Key" & then "Refresh".

> In this way you have to paste the code multiple times till "Liked Videos"